

This article will describe one of many different ways that you can create smart 3-way switching for devices like lights or lamps. This technique can be used to upgrade existing 3-way switches or you can create 3-way switching where it didn't exist before. This can be done without pulling or installing any new wiring in your walls and without adding or altering any existing circuits. The 3-way switches can even be on completely different circuits and can easily be expanded to 4-way or even 5-way switching.
I undertook this project to atone for committing an earlier home automation sin.

Originally, the lamp in the family room was plugged into the top half of an outlet that was controlled by two wall switches in a three-way configuration. Now, it might seem silly to have these two switches so close to each other, but that's the way the house was wired.
I wanted to make this lamp "smart" so it could be controlled via automation... either voice via Google smart speaker or via Home Assistant. This was early in my own home automation journey, so I simply moved the lamp to a different outlet and installed a simple smart plug.

Now, this smart plug did have custom Tasmota firmware flashed to it so it was completely local, but in the process I committed a cardinal sin in home automation... I removed existing functionality instead of enhancing existing functionality. The lamp could no longer be simply controlled by wall switches and could only be turned on or off via voice, Home Assistant or mobile app. Not very friendly for visitors or guests and sometimes even for ourselves. There are times when you just can't beat the simplicity of wall switch. I now had two switches that did nothing!
The alternative was to plug the smart outlet into the switched outlet and then do this on both switches:

This is even worse! So, after gaining quite a bit of additional smart home experience, I set out to fix my earlier mistake and restore the lamp to the switched outlet, but also maintaining my smart home integrations in the process. As always, if you prefer you can watch a YouTube video of this project.
Caveats and Safety Warnings
CAUTION: This project involves working with household mains power. If you are not experienced and comfortable working with AC power, please consider asking for help or even hiring a qualified electrician to complete the wiring.
I am not a licensed electrician, so proceed with this project at your own risk. Assure you are following all local codes for your region. Failure to follow these guidelines could result in personal injury or a catastrophic fire. This is not meant to scare you off. If you have ever replaced a switch or outlet in the wall before, this project takes about the same skill set. But better safe than sorry... so if you are uncomfortable or unsure, seek out more experienced help. Also assure all components and parts that you use are properly rated for the voltage and current of the circuit.
Parts List
As usual, I'm including the parts that I used for this project but in many cases, substitutions may be made or your particular install may require different parts.
Main Project Parts
|
Item Description |
Notes |
|
If using other, must
be able to flash Tasmota |
|
|
|
|
|
Only one of
the following is needed: |
|
|
This is the one I
used and is shown |
|
|
|
|
|
Power monitoring is
not used in this project |
|
|
|
|
|
Wire nuts may be substituted. |
|
|
Short piece of 14/2 Romex
or other 14-gauge solid core wire |
For making short
connections to the Shelly |
|
Decora Replacement Faceplate
(example) |
This will depend on
whether you are installing dimmer in a 2-gang or 3-gang box |
|
|
|
Some of these links may be Amazon affiliate links. Use of these links will not affect your pricing, but as an affiliate this blog may earn a small commission if you make a purchase.
A few notes about the dimmer and Shelly. A dimmer is not required. Any smart switch (or even a second Shelly) can be used as long as it can be flashed with Tasmota or has Tasmota pre-installed. The process described here will not work with standard manufacturer's firmware (like Tuya Smart Life). Some switches may need to be disassembled for flashing and others may be able to be flashed over the air using a process called Tuya Convert, but these types of devices are becoming rarer and harder to find. You can check the Tasmota Device Repository to see what switches and dimmers are compatible and what the flashing procedure involves.
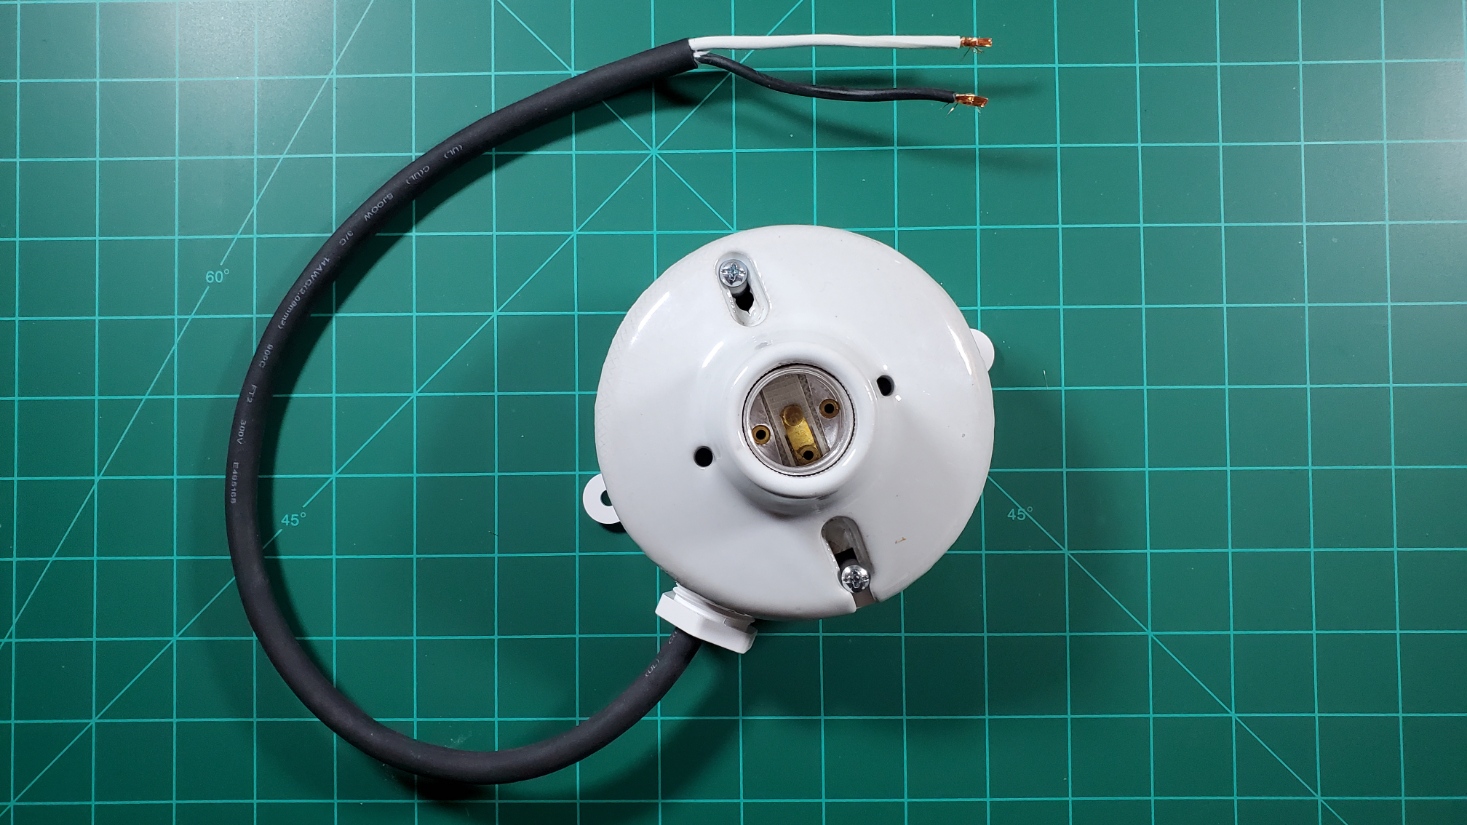
I used an older original Shelly 1PM in my project, primarily because I already had a number of these on hand. This model has been superseded by a newer design. In my install here, the Shelly 1PM will not be connected to the load, so power monitoring is superfluous. A standard Shelly 1 will work just as well and save you a couple of bucks.
Parts Needed for Flashing Tasmota
|
Item Description |
Notes |
|
|
|
|
|
|
|
Optional, but makes
life easier! |
|
|
|
|
Tasmota will need to be flashed to the Shelly relay device and may or may not need to be flashed to the other switch/dimmer depending upon what you purchase. The above parts will work for flashing Tasmota to any compatible device.
Bench Testing Equipment
While technically not required, you may want to bench test your two devices independently and then in the final three-way wiring configuration before installation. To do this, you will need to be able to connect the devices to household mains (AC) power. If you do this on a routine basis, it may be beneficial to create some standard "bench test" equipment for these types of projects.

I use this switched outlet in bench testing for a lot of projects. It gives me switched AC power that I can connect to other AC powered devices for testing. For this project it can be connected to both the Shelly 1 and the Jerry Martin dimmer for testing, but I also use it for things like providing AC power to a 5V or 12V power supply when working with LED strips.

This is really nothing more than a duplex "extension cord" but provides me a standard outlet on the bench top for testing things like smart plugs or other devices that plug directly into an AC outlet.
And of course a standard light socket. For this project, I will be using this and the switched AC power supply. But you don't have to build these for this particular project. You can simply use something like this AC appliance cord:

You can then connect this to your switches using Wago lever nuts or standard wire nuts for bench testing.
Tasmota Installation
If your device does not have Tasmota pre-flashed, Tasmota need to be installed before the devices can be tested. I'll show the basics of flashing the Shelly 1PM here. For other devices, check the available methods and processes in the Tasmota Device Repository
The information provided here is current as of September 2023. Later revisions of either the hardware or Tasmota firmware may require changes to the procedures listed. Refer to the Official Tasmota Site for the most current information.
If your USB-to-TTL adapter has both a 5V and 3.3V setting, assure the device is set to 3.3V!!! Failure to do so will likely damage or destroy your device.

You will also need to connect male-to-female Dupont jumpers to the VCC, GND, TXD and RXD pins on the adapter.
Note: In most cases, you are going to need two connections to GND, since many devices require that your pull the GPIO0 pin to ground on boot to put the device into programming mode. The easiest way to do this is to create a "split" Dupont cable with one female and two male ends:

Just assure that the join between wires is secure. If you think you may be flashing additional devices in the future, I'd recommend soldering this connection and securing with heat shrink tubing. But for a one time use, you can just twist the wire together and maybe throw a little electrical tape on the junction.
The Shelly relays provide pin headers specifically for flashing the device (thanks Shelly!).

Connect the male ends of the Dupont cables from the USB to TTL adapter to the Shelly pin headers according to the above diagram:
- GND and GPIO0 connect to GND
- 3.3V connect to VCC
- RXD connect to TXD
- TXD connect to RXD
Your device should NOT be connected to mains or any other power source other than the USB-to-TTL adapter. Failure to follow this will likely result in destruction of your device and possible damage to your computer! Disconnect any other power sources from the device before proceeding!
There is a wealth of information on installing, configuring and setting up Tasmota on the Official Tasmota Website, so I will only be providing a high level overview of flashing and configuring these particular devices for this use case. Refer to the official site if you need or want additional details on installing, configuring and using Tasmota.
The process for both devices are nearly identical. Once wiring connections are complete, plug the USB-to-TTL adapter into the USB port of the computer that will be used to flash the software.
Once the device is plugged into the computer, a new COM port should be found. Use your computer's device manager or equivalent to identify this COM port and note it.
If you are using a Chrome-based browser, you can flash Tasmota right from your browser. Just open the browser and navigate to https://tasmota.github.io/install/

Just follow the instructions on the screen. Standard Tasmota is adequate for this project. However, if you need or want to install a different version of Tasmota or do not have a Chrome-based browser, you can manually download the desired Tasmota .bin file and use a third-party flasher. See the Getting Started section of the Tasmota website for more information.
Initial onboarding (wifi)
Once flashing is successfully completed, the device will reboot and begin broadcasting a local access point (AP) named tasmota-XXXXXX_yyyy. You may need to disconnect and reconnect the device to your computer's USB port to reset it and exit programming mode.
Use your phone or other mobile device to join the broadcasting Tasmota wifi. If you are not prompted, open a browser and navigate to 192.168.4.1.

Enter in your local wifi network SSID and password and click 'Save'. The device will reboot and attempt to join your wifi. If successful, the following information will be displayed:

Note the newly assigned IP address as you will need this in the following steps or to access Tasmota on the device once connected to mains or at a later time to make changes or upgrades.
Determining Existing Wiring
This may be one of the more difficult parts of the project, especially if the switch you plan to upgrade or replace is in a double-gang or triple-gang box.

Within the box, you need to identify the incoming power line and the line going out to the load you wish to control. Note that if dealing with three-way switches, these can be wired in multiple ways:
 |
| Click to enlarge |
I originally believed my three-way switch was wired like the upper left image above, but testing show it to be wired like the lower right. You can use multimeters, circuit tracers or other methods if necessary. I won't cover the specifics of that here, but you can find many tutorials online if you need help.
For the switch that will be connected to load, identify and mark both the power source and load lines. For any secondary switches (those that will be part of device grouping to control the load but not directly connected), you only need to identify the incoming power source line... or any live hot and neutral wire bundles.
I'll be using the lower right image as an example here, but you will need to adapt this to your particular wiring situation. In effect, one smart switch/relay will be connected to load and all others will only be connected to a hot and neutral.
New Wiring
For this section, I'm going to use stripped down basic wiring diagrams to represent my current three-way switch wiring and how I am going to upgrade it. I've omitted all ground connections for clarity, but all your grounds should be connected together:

In my case, the power source comes into one box. In this box is a three-way switch that is connected to the top half of a standard wall outlet (load). The hot, along with two traveler wires jump over to the second box where they are connected to a second three-way switch. Again, note that this second switch isn't directly connected to load. This is important for our upgrade process.

In the upgraded wiring diagram, the first three-way switch is replaced with my pre-flashed Tasmota dimmer. This is wired as according to the instructions for the dimmer with connections to hot, neutral and load (I'll cover the device specific connections below). I took the prior white wire from the three-way switch and connected to the existing neutral bundle, effectively passing hot and neutral straight through to the second box. In the second box, this hot and neutral are connected to the Shelly relay. The Shelly and second switch are not connected to load in any manner. The red traveler wire won't be used so it is simply capped off.
Note that since the secondary switch only needs a hot and neutral line and isn't connected to load, it can be placed in any box, even one on a completely difference circuit.

This in effect allows you to create a three-way switching situation with two separate switches where one didn't exist before and where there are no travelers or other wiring between the boxes. The three-way switching will be handled by Tasmota device grouping without rewiring any circuits or pulling any new wiring through the walls. But more on that below.
Bench Testing
I strongly recommend that you bench test each device independently, assure your configuration settings are working, then test them together in your planned three-way configuration prior to installing anything in the actual boxes. This will save you a LOT of effort should you need to change the wiring or even do something like start over by re-flashing your device.
Testing the Shelly 1PM
For the standalone testing of the Shelly relay, I am going to connect it to a load (a simple light bulb in this case) even though in the final three-way switch wiring it won't be connected to load. This will allow me to test the configuration and assure the relay is configured and working as planned.
 |
| Click to enlarge |
This is the same way you would connect a Shelly relay for a single pole (2-way) switch. The hot wire from the power source is connected to L1 and neutral is connected to N. The two terminals from the single pole switch are connected to L and SW. The load is connected to the O terminal. In our eventual 3-way switching, we won't be connecting anything to O, but for bench testing I want to use the light.
Configuring Tasmota
Once all connections are made, power can be applied. Then go to the IP address for the Shelly device (as determined when you joined it to your Wi-Fi above). By default, the device will boot up as "Sonoff Basic". The official Tasmota documentation has complete information on configuring your device, so I'm only going to cover the basics needed to get the device working for this project.
First, you need to enter the template for the Shelly 1PM (or Shelly 1 if that is what you are using). You can get the device template from the Tasmota Device Repository Copy and paste the template into the template field under the Configure Other screen.

Be sure to check the "Activate" box. You can also give the Shelly a device and friendly name. If you are using the native Tasmota integration in Home Assistant, these will be used to create the device and entity names. See the Tasmota documentation on Home Assistant integration for how these are used for the Home Assistant names. When you save the changes, the device will reboot and after a few seconds return to the main menu.

At this point, you should be able to toggle the light switch on/off using the standard single pole switch and by clicking the toggle button in the Tasmota interface. If both methods can toggle the light, then the configuration is good to go. Note that if using the Shelly 1 instead of the Shelly 1PM, energy readings will not be shown. If you are using a Shelly 1PM, then you should see energy readings shortly after the light is toggled on. Eventually, this will not be connected to load, so the energy readings are meaningless. But if you are going to use the Shelly 1PM connected to a load, then the power monitoring should be calibrated. See the Tasmota documentation for details on how to calibrate the power.
If you are going to be integrating this device into Home Assistant, you also need to enter your MQTT broker information and preferred topic. But since this project technically doesn't require Home Assistant, I won't be covering any of the Home Assistant portions. There may be some other Tasmota options you may wish to set as well. See the Tasmota documentation, but the above is all we need to do for now to configure and test the Shelly 1 device. You can now disconnect the Shelly from the test setup and move on to testing the second device.. in my case a dimmer switch.
Testing the Martin Jerry Dimmer (pre-flashed)
To test and configure the Martin Jerry dimmer, we just need to remove the Shelly relay and drop in the dimmer, connecting it as according to the manufacturer's instructions. The same process would be used if just using a smart switch instead of a dimmer.
 |
| Click to enlarge |
The smart switch dimmer's black wire is connected to hot, white to neutral, green to ground and the remaining wire (normally brown but sometimes blue... check the device's documentation) is connected to the load.
Once all connections are made, turn on the power. For my pre-configured Tasmota device, I only had to join it to my Wi-Fi network using my phone, much in the same manner as when I flashed the Shelly above. Look for a Tasmota-xxxxxxx hot spot, join it with your phone and go to 192.168.4.1 in a browser and enter your Wi-Fi information. The device will reboot and the new IP address will be shown. At this point, you can go to the IP address in your browser.

Since this device was pre-flashed with Tasmota, most of the configuration is already complete! You may just wish to change the device and friendly name and enter in your MQTT broker information, especially if you plan on integrating into Home Assistant.

At this point, you should be able to toggle the light off/on both with the smart switch/dimmer and via the toggle button in the Tasmota interface. If you are using a dimmer, you should be able to adjust the brightness of the light (assure you are using a dimmable bulb) via either the dimmer controls or the slider in Tasmota.
If you find that the bulb doesn't go as dim as desired at the minimum setting or turns off completely before being completely dimmed, you can set the dimmerrange setting in Tasmota. Or in my case, the dimmer actually had a calibration wheel on the bottom that allowed the minimum brightness to be set.

Once you have the dimmer range set to an acceptable level (if applicable) and have verified control via both the physical switch and Tasmota, the individual bench test for the dimmer is complete.
If your device is not pre-flashed with Tasmota, then you will need to determine how to flash the device, realizing that many of these devices are no longer flashable or they may require you to disassemble the housing (which in many cases is glued together). Check the Tasmota Device Repository for compatible switches and dimmers and the process for flashing Tasmota.
Also note that a handful of other manufactures sell pre-flashed Tasmota devices if you don't particularly like the looks of the Martin Jerry. A couple of examples are Athom and CloudFree but I have not used any of these particular brands so I cannot speak to their quality or suitability.
Bench Testing the Three-Way Configuration
At this point, it is a good idea to wire things up as you expect them to be when installed. In my case, it was in the same manner as shown above under "new wiring". The only difference was that I used a light bulb for the load instead of an outlet (but I could have wired the outlet then plugged in a lamp):
 |
| Click to enlarge |
Again, the dimmer is connected to load and mains power. Mains power is daisy chained over to the Shelly 1, which is connected to a switch (but not to the load). Again, the power for the Shelly 1 can be from the same circuit or from a completely separate source... just as long as a hot and neutral are available.
Creating Tasmota Device Groups
Tasmota device groups allow all devices that are part of that group to communicate directly with one another via Wi-Fi. No hub or other automation system is needed, but all devices must be on the same Wi-Fi/multicast network. Among other features, it allows those devices to stay in sync with each other so that when one device is turned on, all other devices in that group will turn on as well.
To create and enable a device group, there are two commands that must be entered into the console of each Tasmota device:
DevGroupName<x> my_group_name
SetOption85 1
The first command sets the group name and number (a device can be in more than one group) and the second command enables participation in the device group(s). The second command allows you to easily remove and add a device from device grouping. I'll show an example of this use towards the end of this article.

First, select the Console option from the main web interface for your device. This will bring up the console where you can enter commands.

In the console command line at the bottom of the screen, enter in the command "DevGroupNameX" (where X is a number for this group) and then the group name you want to use. I am calling my first group (1) 'familyroom'.
Note: Do not use a zero for the X number. Zero has a special meaning and will reset the current device groups for that device.
After typing the command, be sure to press <Enter> on the keyboard.
| Click to enlarge |
The console log will list the new device group name if the command is successful. Note that after a couple of seconds, the device will reboot to make the device group available. Please give the device a few seconds to finish rebooting before entering in the next command.

Once the device has rebooted, enter in SetOption85 1 to enable this device's participating in the device group(s). Don't forget to hit <Enter> after typing the command.

You can easily remove the device's participation at any time by entering a zero for SetOption85:
SetOption85 0
By default, all syncing options are enabled between devices (on/off, brightness, light color, etc.). If an option is not applicable to a particular device, such as brightness or color, it is simply ignored by the receiving device. So, unless you have specific needs, it is generally fine to leave the device group sharing options as the default of syncing all data.
Also note that you can specify sync send and receive options so that a particular device might receive certain data but not send (or vice versa). This makes it possible to get very granular with how your devices interact. But for this project, both devices will send/receive all data. If you want to know more about the advanced features of device groups in Tasmota, please see the official documentation on Tasmota Device Groups.

Once you have specified the device group for both of your devices and enabled participation (don't forget the SetOption85 1), you can repeat the final bench test.
The switch connected to the Shelly that did nothing before should now toggle the light off/on (as it is syncing it's power state over to the dimmer that is connecting to load). Similarly, toggling the power on the dimmer will also control the light. In effect, you have created three-way switching. Obviously, when the light is dimmed via the dimmer, it doesn't impact the Shelly relay as dimming isn't supported on the Shelly 1PM... so that data is simply ignored.
Once you have device groups set up and have confirmed that all is working as expected with syncing, it is time to actually install the switches.
Installing
This can actually be the most difficult part of the project. Not because of the wiring, but trying to fit everything into the box, especially if you are installing into a double or triple gang box.

Smart switches are significantly more bulky than a standard single pole switch due to the need to house the relay and electronics. Do note that Shelly relays are generally a bit easier to install in an existing circuit due to their smaller size. And if you don't want or need the additional dimming functionality (or want to keep your existing switch), you can use a Shelly relay for both switches. Just substitute the wiring for the dimmer with the wiring for the Shelly (noting that one of the Shelly relays will be connected to load and one will not).

Before proceeding, assure power has been shut off to all circuits in the box.
If you are working in a double or triple gang box, note that there may be more than one circuit. You may have shut off the power to one circuit, but there may be additional circuits that are still live. Use a tester to verify that there is no live power anywhere in the box before proceeding.

As shown above, this is the rat's nest that I found when I removed the faceplate on the triple gang switch where I needed to install the dimmer. It took a bit of finagling to get the dimmer wired and the existing wiring moved around enough to be able to accommodate the increased size of the dimmer, but with care and patience, it is possible.

As mentioned under the parts list, I did have to purchase a new faceplate to accommodate the new dimmer Decora style. However, if you want to keep the existing switch and faceplate or you simply cannot fit a larger smart switch into the box, you can simply forego the dimmer addition and use use a second Shelly relay instead of a smart switch.
 |
| Click to enlarge |
Everything else, including the configuration and device grouping is identical for this type of install. Obviously, there won't be any dimming control, but this method takes a little less space in the box and allows you to keep the current switch and faceplate.
While this is entirely optional, I chose to mark the wiring and terminals for the existing switches before changing anything.

I do this in the event that I want or need to restore the original equipment at some point in time, such as if we decide to sell our home. I may want to take the smart devices with me or since these devices rely on Wi-Fi for full functionality, they won't fully function on a different Wi-Fi network (for example, the new buyers). If you want to know more about how I plan to "make my smart home dumb again" when time comes to sell, I cover that in a different YouTube video on the topic.
Once all your wiring is done and verified, turn the power back on and give everything a final test. If you've wired things properly, you now have three-way "smart" switching... either as an upgrade to existing three-way switches, or where three-way switching never existed before. Congratulations!
Home Assistant
As mentioned, use of Tasmota and Tasmota device groups do not require any other system or hub. But naturally, you can integrate these devices into Home Assistant and create automations, scripts and/or dashboard controls for your new smart switches. Details won't be included here, but if you have the native Tasmota integration installed in Home Assistant, these devices and their related entities will just show up. You can also utilize MQTT and integrate them yourselves via YAML. But regardless of the integration method, an MQTT broker is required and must be configured on the Tasmota device.
Example of my YAML integration for the Martin Jerry dimmer:
mqtt:
light:
- name: Family Room Dimmer
state_topic: "stat/familyrmdim/RESULT"
state_value_template: "{{ value_json.POWER }}"
command_topic: "cmnd/familyrmdim/POWER"
availability_topic: "tele/familyrmdim/LWT"
brightness_state_topic: "stat/familyrmdim/RESULT"
brightness_command_topic: "cmnd/familyrmdim/Dimmer"
brightness_scale: 100
brightness_value_template: "{{ value_json.Dimmer }}"
qos: 2
payload_on: "ON"
payload_off: "OFF"
payload_available: "Online"
payload_not_available: "Offline"
You can find more information on both the Tasmota integration or integrating you devices via MQTT in the official Tasmota Documentation on Home Assistant.
Extending Device Groups to more Switches or Devices
Once you have device groups defined on your Tasmota devices, you can easily extend those groups to include additional Tasmota devices, whether these are switches, relays or even plugs. Here's an example that I ended up using in my family room.

This was my original setup as covered above. Two switches in a three-way configuration controlled a single lamp.

But I really wanted to add a second lamp, so that when either one of the three-way switches were flipped, both the original and 2nd lamp would turn on.
By simply adding a smart plug with Tasmota to the second lamp that was plugged into an always-hot outlet, this was easily accomplished.

By adding the additional smart plug to the existing Tasmota device group (familyroom in my case), turning on either of the three-way switches now turned on both lights! And this was done without any new wiring what-so-ever. Just by adding the new Tasmota device to the existing device group.
What's more, if I wanted, I could easily split apart the three-way switch so that one switch controls one light and the other switch controls the other!

Again... all without any rewiring. This can be done by just changing the device groups or whether a device grouping is enabled/disabled on a device. In the above example, once I had all devices operating in a single group, I disabled device grouping on the dimmer switch connected to the first lamp (SetOption85 0). This means that the dimmer switch acts alone in controlling the first lamp and the other switch is still in a device group with the smart plug so it controls the second lamp.
In fact, once you have your switches, relays or plugs "Tasmotized", you can easily reconfigure your household switching in all sorts of ways.

You can use this technique to not only control multiple devices like lamps, but to create 4-way or even 5-way switching without rewiring any circuits or running new wiring with travelers. In fact, these device groups do not even need to be on the same circuit.
Let me know down in the comments if you have found other unique ways to use Tasmota device groups. And thanks for reading!
Links and More Information
Tasmota Official Documentation

If you'd like to support future content on this blog and the related YouTube channel, or just say thanks for something that helped you out, you can say thanks by buying me a one-off cup of coffee at:
No comments:
Post a Comment
To help eliminate spam and to keep all conversations civil, submitted comments are moderated. Therefore your post may not show up immediately. Please be patient as most reviews are completed within a few hours.